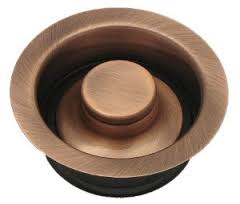
How to Remove a Sink Stopper Flange

A part of the pop-up stopper assembly, the flange rests on top of the sink drain. Yet the most effective and time-saving method of removing the flange from the sink’s pop-up stopper assembly is to venture below the sink. Although this may seem like an uncomfortable proposition, once below the sink, you will find that all the parts that are involved in this repair are easily accessible.
Twist the water valves beneath the sink all the way to the right to shut off the water to the sink. Unscrew the pivot nut, which holds the horizontal pivot rod in place within the tailpiece underneath the sink drain. Use an adjustable wrench to do this. Pull the end of the pivot rod out of the tailpiece.
Pull the pop-up stopper from the sink drain. Position a bucket beneath the sink’s P-trap. Loosen the nut that connects the tailpiece to the P trap below, using the adjustable wrench. Unscrew the connection between the tailpiece and the stopper drain, using the wrench. Unscrew and remove the stopper drain assembly from the bottom of the sink strainer, using slip-joint pliers. If the stopper drain connects to the P-trap directly, without another section between the two, loosen the screw that connects the stopper drain to the P-trap. Then skip to Step 5.
Loosen the locknut that anchors the strainer to the sink, using slip-joint pliers. Enlist a helper to hold a screwdriver in place in one of the holes in the strainer wall from above, while you turn the locknut counter-clockwise from below. Remove the locknut.
Pull the strainer down out of the sink. Push the flange up and out of the sink.
Unscrew the locknut that anchors the stopper drain body to the sink bottom. Use slip-joint pliers. Push the stopper drain body upwards, so that the stopper flange is raised from the sink drain. From above, unscrew the flange from the stopper drain body. Screw the flange counter-clockwise, using your hand.


